Get a better experience by installing our free app!
Not now
Install
Get a better experience by installing our web app!
Hide
How to do it?
In Safari, tap on the menu bar. Scroll down the list of options, then tap Add to Home Screen.(If you don’t see Add to Home Screen, you can add it. Scroll down to the bottom of the list, tap Edit Actions, then tap Add to Home Screen.)
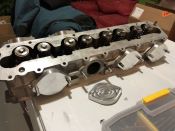
I have a Speed Force Racing's stage 1.5 intercoolers in my car. I think it's a good compromise since it fits under the stock nose panel while still offering significantly more cooling capacity. The intercooler eliminates the factory duct work, however, and just sits in that big empty space without any official provisions to force the air through it. I created some make-shift duct work for it with thin aluminum, tin-snips, and a lot of duct tape, but always wanted to do a better job.
So I finally got around to modeling and printing some duct work. These are done in ABS and take advantage of unused holes on that side wall to bolt them in place. (I used melt-in brass threads from McMaster in the plastic support brackets since I have those handy.) I kept the bottom aluminum piece I had made -- since isn't the mess other pieces were -- and the overall results look pretty cool I think.
Your ducting looks really nice! I have an SFR stage 1.5 IC as well which I was planning to install in the coming weeks. Would love to have similar ducting.
michael wrote: Mon Apr 17, 2023 2:57 pm
Your ducting looks really nice! I have an SFR stage 1.5 IC as well which I was planning to install in the coming weeks. Would love to have similar ducting.
After posting those pictures I made some additional changes to the duct work. I'll try to post updated pictures tomorrow. Basically, I created some additional room for the header panel to better clear, and changed the side braces to attached to the rear-most holes rather than the ones shown in my pictures. I did a little studying and learned that the header panel is supposed to have screws attaching it to the car in the holes I was using. Mine were long-missing, and 'most' of the header panel removal DIYs don't even mention them, but once I learned they "should" be there, I had to have them.
I can post the STL files if you have access to a printer? Or, I could make you a set with the brass inserts etc for something like $20 plus shipping. You still need to use foam and tape to make sure all (or virtually all) air is channeled to the intercooler, along with a flat panel across the bottom, but these pieces do make ducting that intercooler much much easier.
Tom, much appreciated! I don't have any experience using 3D printing. Would gladly take you up on your offer to make me a copy for $20 or whatever you think is reasonable. Given you seem to be local in the bay area, I might even be able to drop by and pick them up.
SIR!...looking effective and professional as always! I've never been a big fan of the vents I've seen in the nose panel so glad it fits and will likely work better than an open vent with no ducting, also maintains the sleeper effect.
michael wrote: Tue Apr 18, 2023 9:14 am
Tom, much appreciated! I don't have any experience using 3D printing. Would gladly take you up on your offer to make me a copy for $20 or whatever you think is reasonable. Given you seem to be local in the bay area, I might even be able to drop by and pick them up.
Happy to print you a set. It did occur to me that I cut away from of the metal on the bottom side of my header panel a long time ago to make room for a front mount intercooler. If you have your panel off, maybe take a picture of it and post it so I can see if that area is going to hit...