Get a better experience by installing our free app!
Not now
Install
Get a better experience by installing our web app!
Hide
How to do it?
In Safari, tap on the menu bar. Scroll down the list of options, then tap Add to Home Screen.(If you don’t see Add to Home Screen, you can add it. Scroll down to the bottom of the list, tap Edit Actions, then tap Add to Home Screen.)
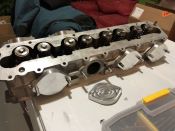
Got a cr*pton of preparatory work done over the weekend to get ready for the engine installation next week. The main items were finishing up the winch assembly for controlling the engine hoist (the garage floor has a lot of slope) and dismantling the wood “dance floor” I built around the car to allow me to work on it while it was up on the hoist.
It looks like everything is on track to put the engine in next weekend, which is a big milestone in my brain for some reason!
One thing I did manage to do on the actual car was put in the fog lights with new lenses and bulbs:
IMG_0358.JPG (2.26 MiB) Viewed 2845 times
I also layered bubble wrap and scraps of cardboard over much of the engine bay and surround since there will be a lot going on during installation day.
The aircraft paint on the systems I work on can be permanently “damaged” by bubble wrap.
It stains the paint with permanent impression of the bubble wrap.
This is new Akzo Noble aircraft paint applications. Mil-spec on military stuff.
Yes there isn’t any clearcoat in our application so I can’t speak to your paint work but something to watch out for.
500 wrote: Mon Apr 15, 2024 8:21 am
Got a cr*pton of preparatory work done over the weekend to get ready for the engine installation next week. The main items were finishing up the winch assembly for controlling the engine hoist (the garage floor has a lot of slope) and dismantling the wood “dance floor” I built around the car to allow me to work on it while it was up on the hoist.
It looks like everything is on track to put the engine in next weekend, which is a big milestone in my brain for some reason!
One thing I did manage to do on the actual car was put in the fog lights with new lenses and bulbs:
IMG_0358.JPG
I also layered bubble wrap and scraps of cardboard over much of the engine bay and surround since there will be a lot going on during installation day.
Thank you for the heads-up. I have not encountered any issues in the past, but I haven't left bubble wrap on paint for long durations either. I think the activated two-component clears are pretty stout, but I will take your caution on board and get that stuff off as soon as I get the engine in on Saturday.
The plans and preparations worked out as hoped overall, but one unexpected issue came up. Right near the end of the day (actually after midnight) I went to install the brake calipers (for the first time) and then discovered that the spindles I had were in fact not turbo/S2 spindles, but just N/A ones. I had purchased them off of eBay years ago specifically as "late-offset turbo spindles" but they were not. I had already found a new home for the original spindles from the car at that point, so I was not able to do a direct comparison, which would have flagged the issue immediately. That said, I never took any measurements or tried to validate that they were turbo spindles, just trusted that they were.
Although everything else went well, I am actually feeling pretty deflated.
Not a lot of pics were taken. Got engine off stand and installed RMS, pilot bearing and flywheel.
500 wrote: Mon Apr 22, 2024 6:42 am
Right near the end of the day (actually after midnight) I went to install the brake calipers (for the first time) and then discovered that the spindles I had were in fact not turbo/S2 spindles, but just N/A ones. I had purchased them off of eBay years ago specifically as "late-offset turbo spindles" but they were not. I had already found a new home for the original spindles from the car at that point, so I was not able to do a direct comparison, which would have flagged the issue immediately. That said, I never took any measurements or tried to validate that they were turbo spindles, just trusted that they were.
Although everything else went well, I am actually feeling pretty deflated.
That is a huge bummer and I can understand making the mistake of not checking a part immediately upon arrival. There are very reputable sellers that can get you the spindles you need. I'm not sure if you are on Facebook, but Elliott at 944 Barn (Blairsville, GA) or Tim von Roretz (Canada) should be able to help if needed. I'm not sure if they are on Carpokes though.
Other than that, I can't wait to see your brand new old 944 S on the road!
1987 951 - Nautic Blue over Linen
2015 Audi RS5 Sepang Blue (Daily)
2023 Durango R/T AWD - Destroyer Grey (Wife's Daily)
2013 Audi A5 Quattro - Brilliant Black (Son's daily)
1987 944 S - Nautic Blue over Linen - sold August 2024
Thanks everyone for the encouragement and commiseration on the spindles!
I am starting to feel a little better about things, and it will all be sorted in time. I had been waiting on some updated strut bottoms for the Subaru's front coil overs which finally arrived last week, so I am going to switch back to the Subaru for a couple of weeks to finish that project and then get back on the 944.
That bubble wrap really did a number... Wow...
Gruhsy, your words were at the front of my mind early Sunday AM as we finished up the job... Although my son and I were pretty tired (it was 2:30 am), we made sure to take all the cardboard and bubble wrap off before calling it a night!
I had almost convinced myself that the knuckles I had were actually correct, after scaling dimensions from pictures of S2/turbo spindles on the screen and called off the hunt for replacements. I was thinking that I had just been too tired when I tried to bolt the calipers on and had misinterpreted the situation.
When I was able to get access again, I confirmed that, no, I was right the first time, they are wrong. The car is on a lift above another car, so the confirmation check had to wait.
So back to searching for replacements. I had previously started looking locally, but then a set came up online which were immediately available and showed no ridges or corrosion on the spindles, so I grabbed them, the price was fair.
s-l1600 (1).jpg (440.01 KiB) Viewed 2477 times
Once received, I checked by bolting the caliper on and it looks like the 298 mm turbo rotors will fit, so I think now I have the right parts, although they look the same. I think the difference in the caliper hole locations is less than 10 mm.
I've de-rusted the outer bodies and they are ready for paint, which will be a combination of 2K satin black over 2K epoxy primer, which I will do with a bunch of other odds and ends over the weekend.
IMG_0493.JPG (3.55 MiB) Viewed 2477 times
Most of my time lately has been spent on finishing up the Subaru, which is almost done. So, things overall are going decently.
As stated in the prior post, have been mostly focused on the Subaru project. It is almost done.
While that was going on, I managed to find what I believe is a decent OEM mid pipe. The old O2 sensor was stuck in, and despite lots and penetrant and some heat, the thing came out in pieces, with some sections of the sensor thread galled onto the bung's thread.
IMG_0806.JPG (5.18 MiB) Viewed 2349 times
After removing those bits (not so easy), the thread looked a little ugh.
IMG_0807.JPG (3.5 MiB) Viewed 2349 times
Thankfully an M18 - 1.5 tap was enough to save it.
IMG_0814.JPG (3.07 MiB) Viewed 2349 times
IMG_0815.JPG (5.36 MiB) Viewed 2349 times
next step will be to get the mid and tail pipes blasted and coated. I am probably going to go with Cerakote, which I used on the 911 and has been very good.
Tim Current: '26 911 Carrera S - PTS Verde British Racing Green
'24 Cayenne S - Algarve Blue Metallic
'21 718 Cayman GTS - Black
'22 911 Turbo S - Carmine Red
'21 718 Cayman GT4 - White
'11 GMC 1500 Quad Cab 4x4 - Black Musik-Stadt Region