New PnP ECU option: ClassicECU Speeduino - build/learning thread

Talk and Tech about turbocharged 924/944/968 cars
User avatar
fasterfaster
Posts: 42
Joined: Wed May 21, 2025 4:24 pm
Has thanked: 126 times
Been thanked: 9 times
Porsche 951 Speeduino/ClassicECU build
I thought I would share my process and experience as a novice of installing and developing ClassicECU’s standalone Speeding-based ECU for 951s.

Background:
I’ve had my 951S since 2011 when I rescued it from neglect of 7 years in a friends garage, but really have done very little of the work on it, and haven’t had the knowledge and capability to do that work. When the car became too unreliable to daily, I moved it my brother’s in Seattle and chipped away at getting it reliable again with some help from Aker’s Porsche up there. The car improved and I started learning things along the way, until my brother totaled it in 2022. Maybe a blessing in disguise, because I decided to buy it back from insurance, fix it up and bring it back to SF, and have since been obsessively diving into the forums and YouTube, while enjoying the ¯\_(ツ)_/¯ out of it. It currently looks and drives better than ever, so of course I need to mess with a good thing.
A0A82249-C660-4D79-B2CA-438F3185D995_4_5005_c.jpeg
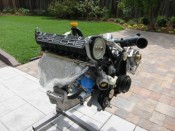
A0A82249-C660-4D79-B2CA-438F3185D995_4_5005_c.jpeg (92.96 KiB) Viewed 687 times
I’m still a novice, but feel confident enough to dive into this and learn as I go. At 200k mi and a salvage title, I no longer feel any pressure to keep it OEM, (though I want to keep it aesthetically OEM). This is now a forever car, so I can do whatever makes me happy.

My short term goals:
- Improve efficiency, reliability, and idle quality of the stock motor.
- Get more visibility into how my motor is running
- Learn some skills and build understanding of how cars and ECUs work
- Set the car up for future upgrades to: modern turbo (eg G25-550), EBC, maybe wasted spark ignition
- Don’t do anything irreversible (like hacking or removing the stock harness), until I’m confident I know WTF I’m doing.

Long term goals (with modern BB turbo and EBC):
- Better street drivability with reduced lag and earlier turbo response, I.e. more area under the curve
- Moderate gains in power but no need for more than 300hp at crank
- Keep it clean and quiet - i.e. stock cat and exhaust, stock intake (minus the AFM)

With that in mind, I evaluated every ECU I could find. From this analysis, the ECUMaster Black bubbled to the top for its features (IP67, built-in WB control, MAP control, and knock) and price point (esp. considering loom pricing which would justify an adapter loom at first, and a full rewire down the road), but still wasn’t plug and play, and sourcing male headers for both Motronic connectors was proving challenging.
Screenshot 2026-03-08 at 7.02.43 PM.png
Screenshot 2026-03-08 at 7.02.43 PM.png (287.94 KiB) Viewed 687 times
Then I dove into Speeduino, starting contemplating printing my own breakout or daughter boards, and stumbled across ClassicECU who had already done exactly that, including the built in VR to use the stock speed and position sensors and 132T wheel. I got in touch with Dirk at ClassicECU and he was super responsive - AND it turned out I would be the first 951 customer, so could help him develop the base tune for our cars. That sounded like unnecessary fun, which is my favorite kind, and another opportunity for me to learn more about my car and tuning.
Last edited by fasterfaster on Sun Mar 08, 2026 8:18 pm, edited 2 times in total.
Marc
88.5 951 M030 Red on Black

#1

User avatar
fasterfaster
Posts: 42
Joined: Wed May 21, 2025 4:24 pm
Has thanked: 126 times
Been thanked: 9 times
So here’s the plan…
Stage 1A - install ECU and tune idle. Just see if I can figure out the basics.
Stage 1B - install WB O2 and tune AFR
- I decided to try using the Bosch LSU ADV *pre-turbo* sensor in the stock position on the crossover. Extensive searching didn’t turn up anyone who has tried this, but the sensor is designed for it, and it saves me having to install a sensor bung below the downpipe. If it holds up, it should also theoretically be more responsive than the traditional downstream location, and using the BMW OEM part number (Bosch 17365, 0258027010 $100 from FCP Euro), it was no more expensive than the standard ADV sensor. EDIT: this sensor uses a non-standard connector, so plan another $12 and some wiring work to make it fit a standard WB controller.
- I’m using the 14point7 Spartan 3 v2 Lite controller, which has a wire for NB sensor emulation, so I’m going to try to wire it on a switch so that I can switch WB/NB modes to confirm base settings for the narrowband setup without having to swap sensors constantly.
- I’m starting with fuel and spark tables adapted from MS and Rogue Tuning
- I’ll be using the TunerStudio’s autotune functionality to refine. If I hit a wall or have trouble, I’ll go to a real tuner.
- The VR and 132T wheel are a big question mark. No one seems to have good luck and reliability with these above 5k RPM or so… I’ll see how it goes, and if it’s a failure, I’ll switch to the pricey but very nicely integrated 36-1 wheel and crank pulley from 928-944parts.com
- ECU has built in MAP so I plan to run that vacuum line, but I’m not sure how useful it can be as a primary tool until I have IAT.
Stage 1C - implement MAP as primary metering
- Weld in IAT bung into charge pipe, and rewire IAT sensor into AFM harness (stock uses IAT at the AFM, pre-charge)
- Get it running
- Hollow out or remove AFM, and retune.

I’ve read as many threads as I could find from folks at have gone Microsquirt, Link, MaxxECU, etc. But would love advice and suggestions. Otherwise, enjoy watching me stumble my way through this.
________________________

So this weekend, I finally got around to stage 1A. Aside, from discovering some unfortunate rust under the passenger side carpet, plugging the ClassicECU ML3.1 951 (henceforth "ML3") couldn't have been easier. It runs on the standard AFM, speed/pos sensors, and narrowband 02 so you literally don't even need to open the engine bay.
IMG_6794.jpeg
IMG_6794.jpeg (1.88 MiB) Viewed 684 times
IMG_6796.jpeg
IMG_6796.jpeg (2.84 MiB) Viewed 685 times
________________________

For those interested…
Stage 2 - modern forced induction
- Dual port WG, EBR, BB turbo, and probably 3bar FPR
- I’m very, very tempted to modify the crossover and downpipe to V-bands, which opens up the use of tons of parts, including the very reasonably priced and well-reviewed Pulsar clones of Tial and Garrett parts. If I could weld inconel it would be a no brainer. For the difference in cost between these and bolt on options, it seems like I can find a good performance exhaust shop to make the mods. I’d end up with a lot more flexibility to play down the road, cheaper spares, and MUCH easier wrenching.
- Will keep you all posted as I dive into this, but it won’t be until sometime late ’26 at the earliest.

Stage 3 - more modernization
- Drive by wire (per this RL thread)
- Wasted spark dual coil ignition
- High impedance EV6 injectors

With 200k mi on what I believe is the original bottom end, there’s probably a rebuild in there at some point, but right now compression is great, so I figure I’ll just run it until it tells me it needs a break.
Last edited by fasterfaster on Sun Mar 08, 2026 9:22 pm, edited 4 times in total.
Marc
88.5 951 M030 Red on Black

#2

User avatar
fasterfaster
Posts: 42
Joined: Wed May 21, 2025 4:24 pm
Has thanked: 126 times
Been thanked: 9 times
For anyone using this as a guide...

Shopping List:
Stage 1A
- ClassicECU 3.1 for 951, 500€ + shipping
- Upgrade to Tunerstudio MS from Lite, $70
- USBC to USBB “printer” cable, $7
Stage 1B
- Bosch LSU ADV Pre-Turbo WB 02 Sensor, $110 shipped
- 14point7 Spartan 3 v2 Lite WB 02 controller, $108 shipped
Stage 1C
- GM Delphi Fast-Response IAT Sensor, $31 shipped - I went with the Metric M14 x 1.5 which was $10 extra and harder to find than the SAE, but helps me keep me car and my tools Metric.
- Aluminum M14 x 1.5mm Bung for the IAT, $9 - I’ll need a shop to weld it for me

Prep:
- Install Tunerstudio (in my case on an M1 MacBook Pro running OSX Tahoe 26.3.1), upgrade and register
- Install Arduino IDE and Teensyduino on laptop. This is necessary for the serial/USB drivers, and enables detect in TS
- Download the ClassicECU ML3 TunerStudio projects, firmware, and tuning files locally
- Save copies of every 95 IGN and VE table I could find (MS, Maxx, Rogue) locally to the laptop, as I don’t have connectivity in my workshop.
- Print out the ClassicECU Manual to hardcopy, as well as several of the base tune tables.
Marc
88.5 951 M030 Red on Black

#3

User avatar
fasterfaster
Posts: 42
Joined: Wed May 21, 2025 4:24 pm
Has thanked: 126 times
Been thanked: 9 times
Documenting my successes and failures, keeping in mind this ECU was purchased knowing it didn't yet have a proper base tune.

As hoped and expected, I am failing and learning a lot, quickly.
Here's how to get started:
1. I started with the base tune provided: ML31_R102_T41_FW202402.2_944_turbo_2025_12_07_TPS.msq
  • Correct engine constants (be careful about SAE/metric units)
  • Correct injector parameters, specifically Voltage correction table
  • Calibrate TPS
  • Select Narrowband AFR
  • Calibrate IAT (in stock form it uses the IAT built into the AFM). I actually forgot to do this, so need to revisit next time.
2. Finally, start the car - it idled high but ran well enough to get it to operating temp (>85C)
3. I *then* went through an idle tuning sequence without idle controls as recommended in this YT video
  • Warm engine up to operating temp with base settings.
  • Turn off Idle Control in Startup/Idle Settings
  • Turn off EGO Control in Fuel Settings by reducing Controller authority from 10 to 0
  • Set VE table in Idle area to single figure (used 30 at first, base tune was in the 50s!!)
  • Set ignition advance to 10 degrees at (and just above) idle, with up to 5 degrees more (15deg total) below target idle.
Screenshot 2026-03-07 at 10.21.35 PM.png
Screenshot 2026-03-07 at 10.21.35 PM.png (387.1 KiB) Viewed 679 times
4. Thanks to this extra step, I discovered the car naturally idled too low and my throttle body idle needed adjustment to open up a little more. I suspect the last time it had been set, I had a small vacuum leak that I since addressed. This gave me a stable idle ~800RPM at operating temp with no idle controls from the ECU.
5. Second discovery was that the fueling in the base tune was extremely rich at 50, I started at 30 and ended up landing on 15, which also allowed me to close the idle screw at the throttle a touch more, while still maintaining a smooth 800rpm at temp. My actual target is 850RPM, but I wanted the base setting a touch lower so the idle controls could actively manage it
Base:
Screenshot 2026-03-07 at 10.10.39 PM.png
Screenshot 2026-03-07 at 10.10.39 PM.png (818.83 KiB) Viewed 679 times
Adjusted:
Screenshot 2026-03-08 at 2.09.49 PM.png
Screenshot 2026-03-08 at 2.09.49 PM.png (2.68 MiB) Viewed 679 times
6. Third change is that I lowered the ignition advance in the idle range significantly from base settings. Using the stock DME settings as reference, and based on some Microsquirt tunes, I started at 10 degrees of advance at idle.
  • this approach also allowed me to tune more of the idle advance into the base ignition map, and rely less on the closed loop idle advance controls.
7. I turned on the Idle Up for A/C, but did not test it yet.

This got me to a stable idle at least at operating temp. Next step was to get the Idle Controls working, but this didn't go quite as planned...
Last edited by fasterfaster on Sun Mar 08, 2026 9:05 pm, edited 2 times in total.
Marc
88.5 951 M030 Red on Black

#4

User avatar
fasterfaster
Posts: 42
Joined: Wed May 21, 2025 4:24 pm
Has thanked: 126 times
Been thanked: 9 times
Confident in my base idle settings, I then turned on Closed Loop Control. The car seemed to run well, however:
  • the car was warm so I wasn't able to test how well it tracks during warmup
  • the idle advance table seemed to be running backwards in Tunerstudio. I know that sounds bizarre, but when the engine was running over target (e.g. 950rpm), Tunerstudio was calling that negative delta (i.e. "-100") and calling for more advance (e.g. "+2 degrees). You can see in this example image below, with the car at 0RPM, the idle advance is looking up the +200 and calling for -5 degrees of advance.
Screenshot 2026-03-08 at 1.48.33 PM.png
Screenshot 2026-03-08 at 1.48.33 PM.png (2.52 MiB) Viewed 675 times
  • because I was not confident in my interpretation of the table, I decided to stop with tuning for the day.
Can someone walk me through the idle advance table? Every curve I've seen for this table is from the upper left to lower right, with positive advance values for negative RPM delta values, but when I ran that on my car negative RPM delta was when it was running fast, and that makes it seem like it was ADDING advance when running fast which is the opposite of what I want. :wtf:

Other side note is that the LSU ADV Pre-Turbo sensor I tracked down uses a non standard Male 02 sensor connector, so I ordered up the correct/standard female connector and will have to swap them and hope I get the pinout correct. It is a great deal on that sensor but I'm guessing they connectorize it differently to avoid mixing up the pre-turbo and post-turbo sensors on those BMWs?
Marc
88.5 951 M030 Red on Black

#5

944m3
Posts: 313
Joined: Thu Aug 10, 2023 9:33 pm
Has thanked: 17 times
Been thanked: 85 times
Very cool project. Seems many of us have followed similar paths of research and eventually picking an ECU to go with. I think any modern ECU, open source or off the shelf, can support our cars. Just a matter of learning curve and how many inputs/outputs you will eventually need/want. From my experience, the more the better because once you learn and get the hang of things the more options or sensors you want to add.

I’m on the same journey you’re on with a MaxxECU Race. So no experience with Tuner Studio. I’m sure someone else will chime in. But if I’m reading your issue correctly, maybe you have a compensation table somewhere that is way off which is why you’re getting weird correction numbers. I ran into that myself, but that is just a guess. Make sure you understand everything making corrections and that your base settings are spot on.

But sounds like you’re on the right track. I started last summer and I laugh at what I thought I knew or thought I understood just a couple of months ago. And I’m definitely still learning but it’s been a blast and the car has never run better.

Couple of other suggestions, I placed my IAT sensor on the charge pipe between intercooler and throttle. The intake manifold gets really hot which might impact the IAT sensor temp reading. Second, if you haven’t done so already and if the ECU supports it, before you really start driving and testing make sure you set limits so that you don’t accidentally hurt something. The obvious ones being a rev limiter and boost limit cutting fuel on both. Both have already saved me. I also have an oil pressure sensor which really gives me peace of mind. I have minimum settings which cut the engine if met.

Looking forward to reading your updates.

#6

User avatar
fasterfaster
Posts: 42
Joined: Wed May 21, 2025 4:24 pm
Has thanked: 126 times
Been thanked: 9 times
944m3 wrote: Sun Mar 08, 2026 9:03 pm But if I’m reading your issue correctly, maybe you have a compensation table somewhere that is way off which is why you’re getting weird correction numbers. I ran into that myself, but that is just a guess. Make sure you understand everything making corrections and that your base settings are spot on.
Thanks for the reply and the tip. Your posts are some of the ones that inspired me to go for this. No faster way to learn!

I'll dig a little further to see what I missed on compensation tables. I'm also in direct touch with the vendor, Dirk, who has been great. I warned him I was a novice up front and he seems okay with that. So far. :lol:
944m3 wrote: Sun Mar 08, 2026 9:03 pmBut sounds like you’re on the right track. I started last summer and I laugh at what I thought I knew or thought I understood just a couple of months ago. And I’m definitely still learning but it’s been a blast and the car has never run better.

Couple of other suggestions, I placed my IAT sensor on the charge pipe between intercooler and throttle. The intake manifold gets really hot which might impact the IAT sensor temp reading. Second, if you haven’t done so already and if the ECU supports it, before you really start driving and testing make sure you set limits so that you don’t accidentally hurt something. The obvious ones being a rev limiter and boost limit cutting fuel on both. Both have already saved me. I also have an oil pressure sensor which really gives me peace of mind. I have minimum settings which cut the engine if met.
Yeah, I'm a little confused about using the IAT built into the AFM. On the one hand no concern of heat soak from the manifold. On the other, it's getting ambient temps before the compressor. I guess if it was good enough for the motronic, it should work, but I don't really understand where the computer is reconciling it to get air mass. In any case, my plan is not to run it extensively in this form - it will get an IAT on exactly the charge pipe you described, and the AFM signal will get dropped for the MAP hose already plugged in.

Great note on setting the limits, especially oil press which I wouldn't have thought of. Thanks. I didn't see that in the ClassicECU manual, but I'm certain the Speeduino platform and TunerStudio supports the basics.
Marc
88.5 951 M030 Red on Black

#7

User avatar
walfreyydo
Posts: 117
Joined: Wed Dec 11, 2024 7:28 am
Location: Wisconsin
Has thanked: 25 times
Been thanked: 51 times
Contact:
Cool project, here are a few thoughts

For closed loop idle, I think you need a PWM style IAC (such as is found on the S and S2) and I dont think the oem 951 IAC is setup that way (correction - @johnb confirms that it is PWM), since those still use a idle adjustment screw and idle isnt dynamically controlled with the ICV. Closed loop isnt necessary and open loop idle can work fine, so I might focus more on staying in open loop and getting my base tune setup and then come back to figure out closed loop as something you come back to once the car is running well.

Since you are running standalone EMS now, you can toss the AFM and change to a speed density setup (as opposed to the oem air metered system) or change to a MAF. Speed density requires a MAP sensor and IAT sensor (I am using a GM IAT) and ideally a variable TPS, which the 951 has. Doing so will remove the air restriction of the stock AFM, and replace with a dedicated IAT, which is a big benefit, especially on NA cars. Alternatively and more simply, you can incorporate a MAF, but either way, youll want to get rid of the AFM. I have read that on a turbo car you can potentially max out the MAF's ability to meter air, which is why speed density is preferred. Here is the kit I bought from diyautotune and the pipe with bung already welded (if you cant weld the bung yourself) - although you could run any IAT sensor as long as its calibrated in TunerStudio.

Idle timing advance may not be needed (could be turned off) since you already have that sort of built into your timing table (as you are already increasing timing below your target rpm in the timing table). I ran it for abit, didnt notice a huge difference, and I dont think timing affects idle speed as much as air (ie: your IAC settings) and fuel.

Also, since this is a turbo car you may want to increase your binning on all your tables to go above 100kpa (better to go to whatever kpa your max boost is, such as 200kpa). 100kpa is fine for a NA car though. 100kpa basically equals atmospheric pressure at sea level (which is the same as WOT on an NA car), below 100kpa is vacuum, above 100kpa is boost. I also notice in your bottom row of the VE table, you have the fuel drastically reduced. You may be better off using "overrun fuel cutoff" instead of reducing fuel in those lower cells, based on a minimum RPM and minimum TPS % (I use less than 1500rpm and less than 3% tps to activate ORFC). The reason is when you are cruising around parking lots, with your foot barely on the throttle, you may be using those lower cells so you may not want them overly lean (at cruising you can aim for AFRs closer to 14.7 or sometimes higher to maximize fuel economy) and it may want to surge or run poorly with that low of fuel.

I have gone through this process on my S2 running megasquirt/tuner studio. My tune isnt perfect and still has work to go. I have found running open loop idle works fine and I havent really figured out closed loop yet (ie: perfect mix of PID settings). Having a variable TPS also greatly helps with acceleration enrichment (imo, TPS > MAP accel enrichment)

Also, I assume you have a wideband O2 sensor, but if not, this is going to be absolutely needed in order to tune the car further. I am using the Innovate MTX-L, but any unit should work

Lastly, the Turbine Research videos you linked are good ones. I used the same to get my car setup

Image
GM IAT sensor in place of AFM from DIYAutotune and a universal coupler
Last edited by walfreyydo on Mon Mar 09, 2026 10:24 am, edited 11 times in total.
89 S2 Variocam, Megasquirt DIYPNP
Garage

#8

User avatar
Dare
Posts: 31
Joined: Wed Mar 16, 2022 3:03 pm
Location: San Jose / Palm Springs
Has thanked: 19 times
Been thanked: 13 times
Fun project! I’m down a similar path with my MicroSquirt-based ECU. Definitely lots of learning left to do on my part.

Looking at your plan, overall I think it will be a great educational experience, but the way you’ve mapped it out it seems like you’ll be doing a lot of re-tuning at various stages, e.g. when you switch to MAP/IAT, then when you upgrade to a 3Bar FPR/bigger injectors, and then again when you upgrade the turbo. Might make sense to not go too deep on fine tuning (e.g. the idle stuff) in the early stages until you’ve got the basics of your setup in place.

In a similar vein, if you haven’t done it already, you might want to spend a little time assessing the state of your wiring harness, especially around the injector wires/connectors. My harness was badly eroded in a few places, with crumbling insulation and exposed wires. This can make tuning a nightmare. Luckily its relatively straightforward to patch up minor damage if you discover it.

I noticed you’re running with “incorporate AFR” turned off. Is there a reason for that? I assume this works the same in Speeduino as it does in MegaSquirt. If so, then in my mind, it doesn’t make sense to not take advantage of the logical separation it gives you when tuning the VE table vs. setting target AFR. Additionally, should you want to switch it on in the future, this would be another point at which you’d have to re-tune (although it is possible to back calculate it if you have the right initial settings).
Jay
2012 Porsche Cayman R
1986 Porsche 944 Turbo

Jay's Porsche Project

#9

User avatar
Dare
Posts: 31
Joined: Wed Mar 16, 2022 3:03 pm
Location: San Jose / Palm Springs
Has thanked: 19 times
Been thanked: 13 times
walfreyydo wrote: Mon Mar 09, 2026 5:22 am For closed loop idle, I think you need a PWM style IAC (such as is found on the S and S2) and I dont think the oem 951 IAC is setup that way (someone feel free to correct me if I am wrong here), since those still use a idle adjustment screw and idle isnt dynamically controlled with the ICV.
The 951 IAC supports PWM and the DME is wired to be able to use this (although I don't know what the factory DME firmware does in practice).

I have my IAC functioning in PWM mode with my microsquirt ECU, but I haven't spent any time tuning it. Indeed, since mine is a track car, I might end up ditching it altogether, since I don't really care about idle quality per se.
Jay
2012 Porsche Cayman R
1986 Porsche 944 Turbo

Jay's Porsche Project

#10

Post Reply