


I think is partially why I am confused. My oil pump is sealed and leak free.
I think Michael is meaning to add a bead of 574 at one of the external seams between the pump and block...but I am just not sure exactly where.
Oil pan gasket sealing
-
Drscottsmith
- Posts: 230
- Joined: Thu Feb 16, 2023 5:43 pm
- Has thanked: 3 times
- Been thanked: 15 times
Here.
Finger painting was never my thing lol.
Just did this now on my iPhone picture editing.
This has been mentioned before that it is recommended to temporarily install oil pump then torque down crank girdle to help keep the three mating surfaces as flush as possible.
Not claiming credit for the idea
Girdle in your pic appears like it has a lip between girdle and block.
Finger painting was never my thing lol.
Just did this now on my iPhone picture editing.
This has been mentioned before that it is recommended to temporarily install oil pump then torque down crank girdle to help keep the three mating surfaces as flush as possible.
Not claiming credit for the idea

Girdle in your pic appears like it has a lip between girdle and block.
- Add Pictures/Files
-
- IMG_7777.jpeg (248.52 KiB) Viewed 862 times
-
- IMG_7776.jpeg (162.61 KiB) Viewed 865 times
-
Drscottsmith
- Posts: 230
- Joined: Thu Feb 16, 2023 5:43 pm
- Has thanked: 3 times
- Been thanked: 15 times
Thanks grushy -
-
michaelmount123
- Posts: 297
- Joined: Fri Jul 09, 2021 7:51 am
- Has thanked: 25 times
- Been thanked: 177 times
Apologies for all the confusion. I'll try again...
The oil pan gasket (seal) lays on what's typically called the pan rail. The pan rail on the block is not complete until the oil pump is mounted, since the pump adds the very front section of the pan rail including the 90 degree bends and the looped cross over to the opposite side pan rail. With the oil pump installed, there's a seam in the pan rail where the oil pump meets the block. This seam on the pan rail is where I put a small bead of 574. All this said, the sealant on this seam may not even be necessary, but it certainly doesn't hurt. Can someone post a photo of the seam for clarification?
The oil pan gasket (seal) lays on what's typically called the pan rail. The pan rail on the block is not complete until the oil pump is mounted, since the pump adds the very front section of the pan rail including the 90 degree bends and the looped cross over to the opposite side pan rail. With the oil pump installed, there's a seam in the pan rail where the oil pump meets the block. This seam on the pan rail is where I put a small bead of 574. All this said, the sealant on this seam may not even be necessary, but it certainly doesn't hurt. Can someone post a photo of the seam for clarification?
-
michaelmount123
- Posts: 297
- Joined: Fri Jul 09, 2021 7:51 am
- Has thanked: 25 times
- Been thanked: 177 times
Switching gears here. This is about ensuring the girdle aligns with the block which was mentioned above:
The factory service manual says to use a whetstone or equivalent to even up the two surfaces. I have another method that is quick and easy:
- Lightly snug all the 10mm and 12mm girdle (lower case half) fasteners.
- Bolt on your oil pump without sealant and tighten the 6mm bolts.
- Finish tighten the girdle bolts.
- Remove the oil pump and find the two surfaces are perfectly aligned.
- Run your bead of 574 around the pump, put a little extra at the joint in the block.
- Hug your dog.
MM
-
michaelmount123
- Posts: 297
- Joined: Fri Jul 09, 2021 7:51 am
- Has thanked: 25 times
- Been thanked: 177 times
- 944 Pan Rail (2)_LI.jpg (105.96 KiB) Viewed 836 times
-
Drscottsmith
- Posts: 230
- Joined: Thu Feb 16, 2023 5:43 pm
- Has thanked: 3 times
- Been thanked: 15 times
- IMG_0214.jpeg (566.57 KiB) Viewed 835 times
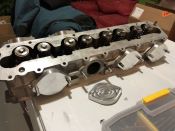
Some photos of 86 block Michael sleeved.
Project my neighbor bailed on.
Copy and edit pics for clarity at anyone’s leisure.
Project my neighbor bailed on.
Copy and edit pics for clarity at anyone’s leisure.
- Add Pictures/Files
-
- IMG_7787.jpeg (2.06 MiB) Viewed 819 times
-
- IMG_7788.jpeg (2.43 MiB) Viewed 819 times
-
- IMG_7786.jpeg (2.41 MiB) Viewed 819 times
-
- IMG_7785.jpeg (2.63 MiB) Viewed 819 times
-
- IMG_7784.jpeg (2.75 MiB) Viewed 819 times
-
- IMG_7783.jpeg (2.14 MiB) Viewed 819 times
-
- IMG_7782.jpeg (2.78 MiB) Viewed 819 times
-
michaelmount123
- Posts: 297
- Joined: Fri Jul 09, 2021 7:51 am
- Has thanked: 25 times
- Been thanked: 177 times
- IMG_7783_LI.jpg (4.25 MiB) Viewed 808 times
-
Drscottsmith
- Posts: 230
- Joined: Thu Feb 16, 2023 5:43 pm
- Has thanked: 3 times
- Been thanked: 15 times
Perfect! Thanks everyone. Will post some pics of the work when I get back under there this weekend!