Page 1 of 2
Ugh, Broken Cam Cover Bolt
Posted: Sun Dec 29, 2024 9:23 pm
by miggytosh
So.... I decided to tighten the 5mm cam cover bolts on my '89 S2 and one of the center ones felt way looser than it should've and sure enough it was sheared off at the base of threads. I think it was time to change the cover gasket anyway. Any other "while your in there" things I should look at?
Re: Ugh, Broken Cam Cover Bolt
Posted: Mon Dec 30, 2024 12:00 am
by dr bob
That bolt looks amazingly familiar. If there's good news, it's that the bolts are soft enough to shear off without much stretch in the threaded section. so removing the remaining part from the cam box isn't impossible.
You will want to replace all the rubber grommets the bolts pass through. At least on the 928 donor car, the factory specs extra cup washers for the mid-cover bolts. Recommendation is to add those to the rest of the bolts to get slightly better pressure on all the seals. Replace the seals around the oil vapor vent ports too.
If you decide to refinish the cover, you may find that the casting cleans up a little rough especially if it's bead blasted. It's magnesium so special prep is needed. I can advise NOT to blast the inside surfaces. I no longer have any of the poly powder we blended to get a factory-color match, but the actual color varied some among the years anyway. Do be prepared to work with the painter to do repairs, and a reminder again that there are some special techniques and critical time limits between blasting and getting the first finish layers applied.
I used a very thin film of blue Hylomar sealant on the ring gasket in the cover groove, on the plug tube seals, and on the bolt seals. The corner joints at the manifold on the 928 got some silicone form-a-gasket per the WSM instruction. A tiny inspection mirror down the plug tube let me verify that the seals were still in place after the cover was placed but before it was tightened. I used some tiny cable ties to hold the perimeter gasket in place until the bolts were started and a little pressure applied. Then cut and remove the ties before each bolt goes in. Others have recommended very fine copper wire for this.
While the cover is off, look hard at the chain and tensioner pads between the cams. The pad on the tensioner is replaceable. If the chain is stretched, the cams come out for the chain replacement, and there's some specific tooling you'll want to use to avoid breaking them. The end plugs (3) and pins for the oil galley holes, plus the seal behind the drive gear will get replaced then too. Timing belt too of course, and all that entails.
Last but not least, your best friend will be a torque-limiting driver. The bolts get about 6 lbs/ft and no more. If you decide to add some pressure to try and solve a leak, add another shim washer under the bolt head; just tightening more will only snap the bolts, as you discovered.
HTH!
Re: Ugh, Broken Cam Cover Bolt
Posted: Mon Dec 30, 2024 9:18 am
by barnwerks
Good advice here from dr bob, of course.
I do encourage all who venture inside this cover, to carefully evaluate the underside finish condition in order to determine the need for refinishing. Many of the covers I'm seeing, have an interior finish that is failing in a dramatic way. The failure of the finish results in flakes of the original film finish as well as oxidized bits of magnesium loose above the sliding interface of cam lobes and followers and in the oil drain path to the sump. The failed finish also prevents the plug well and perimeter seals having a smooth surface to seal against. In my opinion, a proper media blast and powder or ceramic coating is required to assure a clean, sealable, non-shedding interior finish.
Re: Ugh, Broken Cam Cover Bolt
Posted: Mon Dec 30, 2024 9:36 am
by barnwerks
- WIN_20240508_18_37_10_Pro.jpg (2.93 MiB) Viewed 3713 times
Picture being worth a thousand words and all:
This is a typical cam cover interior condition.
Re: Ugh, Broken Cam Cover Bolt
Posted: Mon Dec 30, 2024 9:47 am
by miggytosh
Thanks @dr bob and @barnwerks for the incredibly helpful and quick responses! This is just the information I was looking for and totally curious what the underside of the cover looks like. I'll post a picture when I get it off.
Re: Ugh, Broken Cam Cover Bolt
Posted: Mon Dec 30, 2024 9:53 am
by Zirconocene
If the cam cover is off, you should inspect your chain guides/pads. Somewhat unfortunately, it's difficult to have a good look at the lower pad but the upper can help tell the story.
It's not so cheap insurance to make sure nothing bad happens to your cams if one or both decide to take a retirement package. Then, if you do go that route, you should replace the chain. That is actually cheap insurance, even for the racing version.
Cheers
Re: Ugh, Broken Cam Cover Bolt
Posted: Mon Dec 30, 2024 1:03 pm
by 3liter914-6
I had this happen to me a few weeks ago when I was removing the cam cover to inspect the timing chain pads. I gave it a good amount of heat, some Gibbs, and some hammer love taps and was able to get the broken piece out with a satisfying crack as it came loose. I really didn't want to bugger it up and have to drill and helicoil. Hopefully it works out/worked out for you.
I didn't like the idea of having mismatched cam cover bolts and the OE gold chromate was something like $15 IIRC, so I ended up just buying all new stainless ones. I looked around and Rennbay had the best price on them at $5.25 ea for both the long and short.
Re: Ugh, Broken Cam Cover Bolt
Posted: Mon Dec 30, 2024 1:47 pm
by dr bob
The stainless bolts are a pretty good idea to keep the head color consistent. And while we all seem to love stainless for not corroding, It's also not as strong as the original plated steel. The threaded ends are 6mm, so not that strong even in original steel. I tend to install the bolts with a tiny amount of anti-seize, with that 6 lbs/ft torque only, and let the friction in the grommet seals help keep them in place. I hate having to remove the broken-off stubs from the aluminum head just because. Meanwhile there's bound to be some original cad-plated bolts floating around among forum members who have replaced the whole set. You just need one, right?
My casual tool collection includes a spiffy vintage Japanese torque handle with a 1/4" square insert, calibrated in lbs/inch for this work. 72 lbs/inch is the target max. Even the bargain Harbor Freight 1/4"-drive click wrench will work for these. The actual torque allowance is amazingly small, which that torque driver regularly reminds me. It's way too easy to succumb to precision bare-handed "that's not going anywhere" tightening, through "just a little more will stop that oil seepage", all the way to "I'll just leave the top of the bolt in the seal to keep oil from flying out. Nobody will ever know -- there's plenty of other bolts!. Maybe just glue it back in with a little silicone."
Let us know how it works out.
Re: Ugh, Broken Cam Cover Bolt
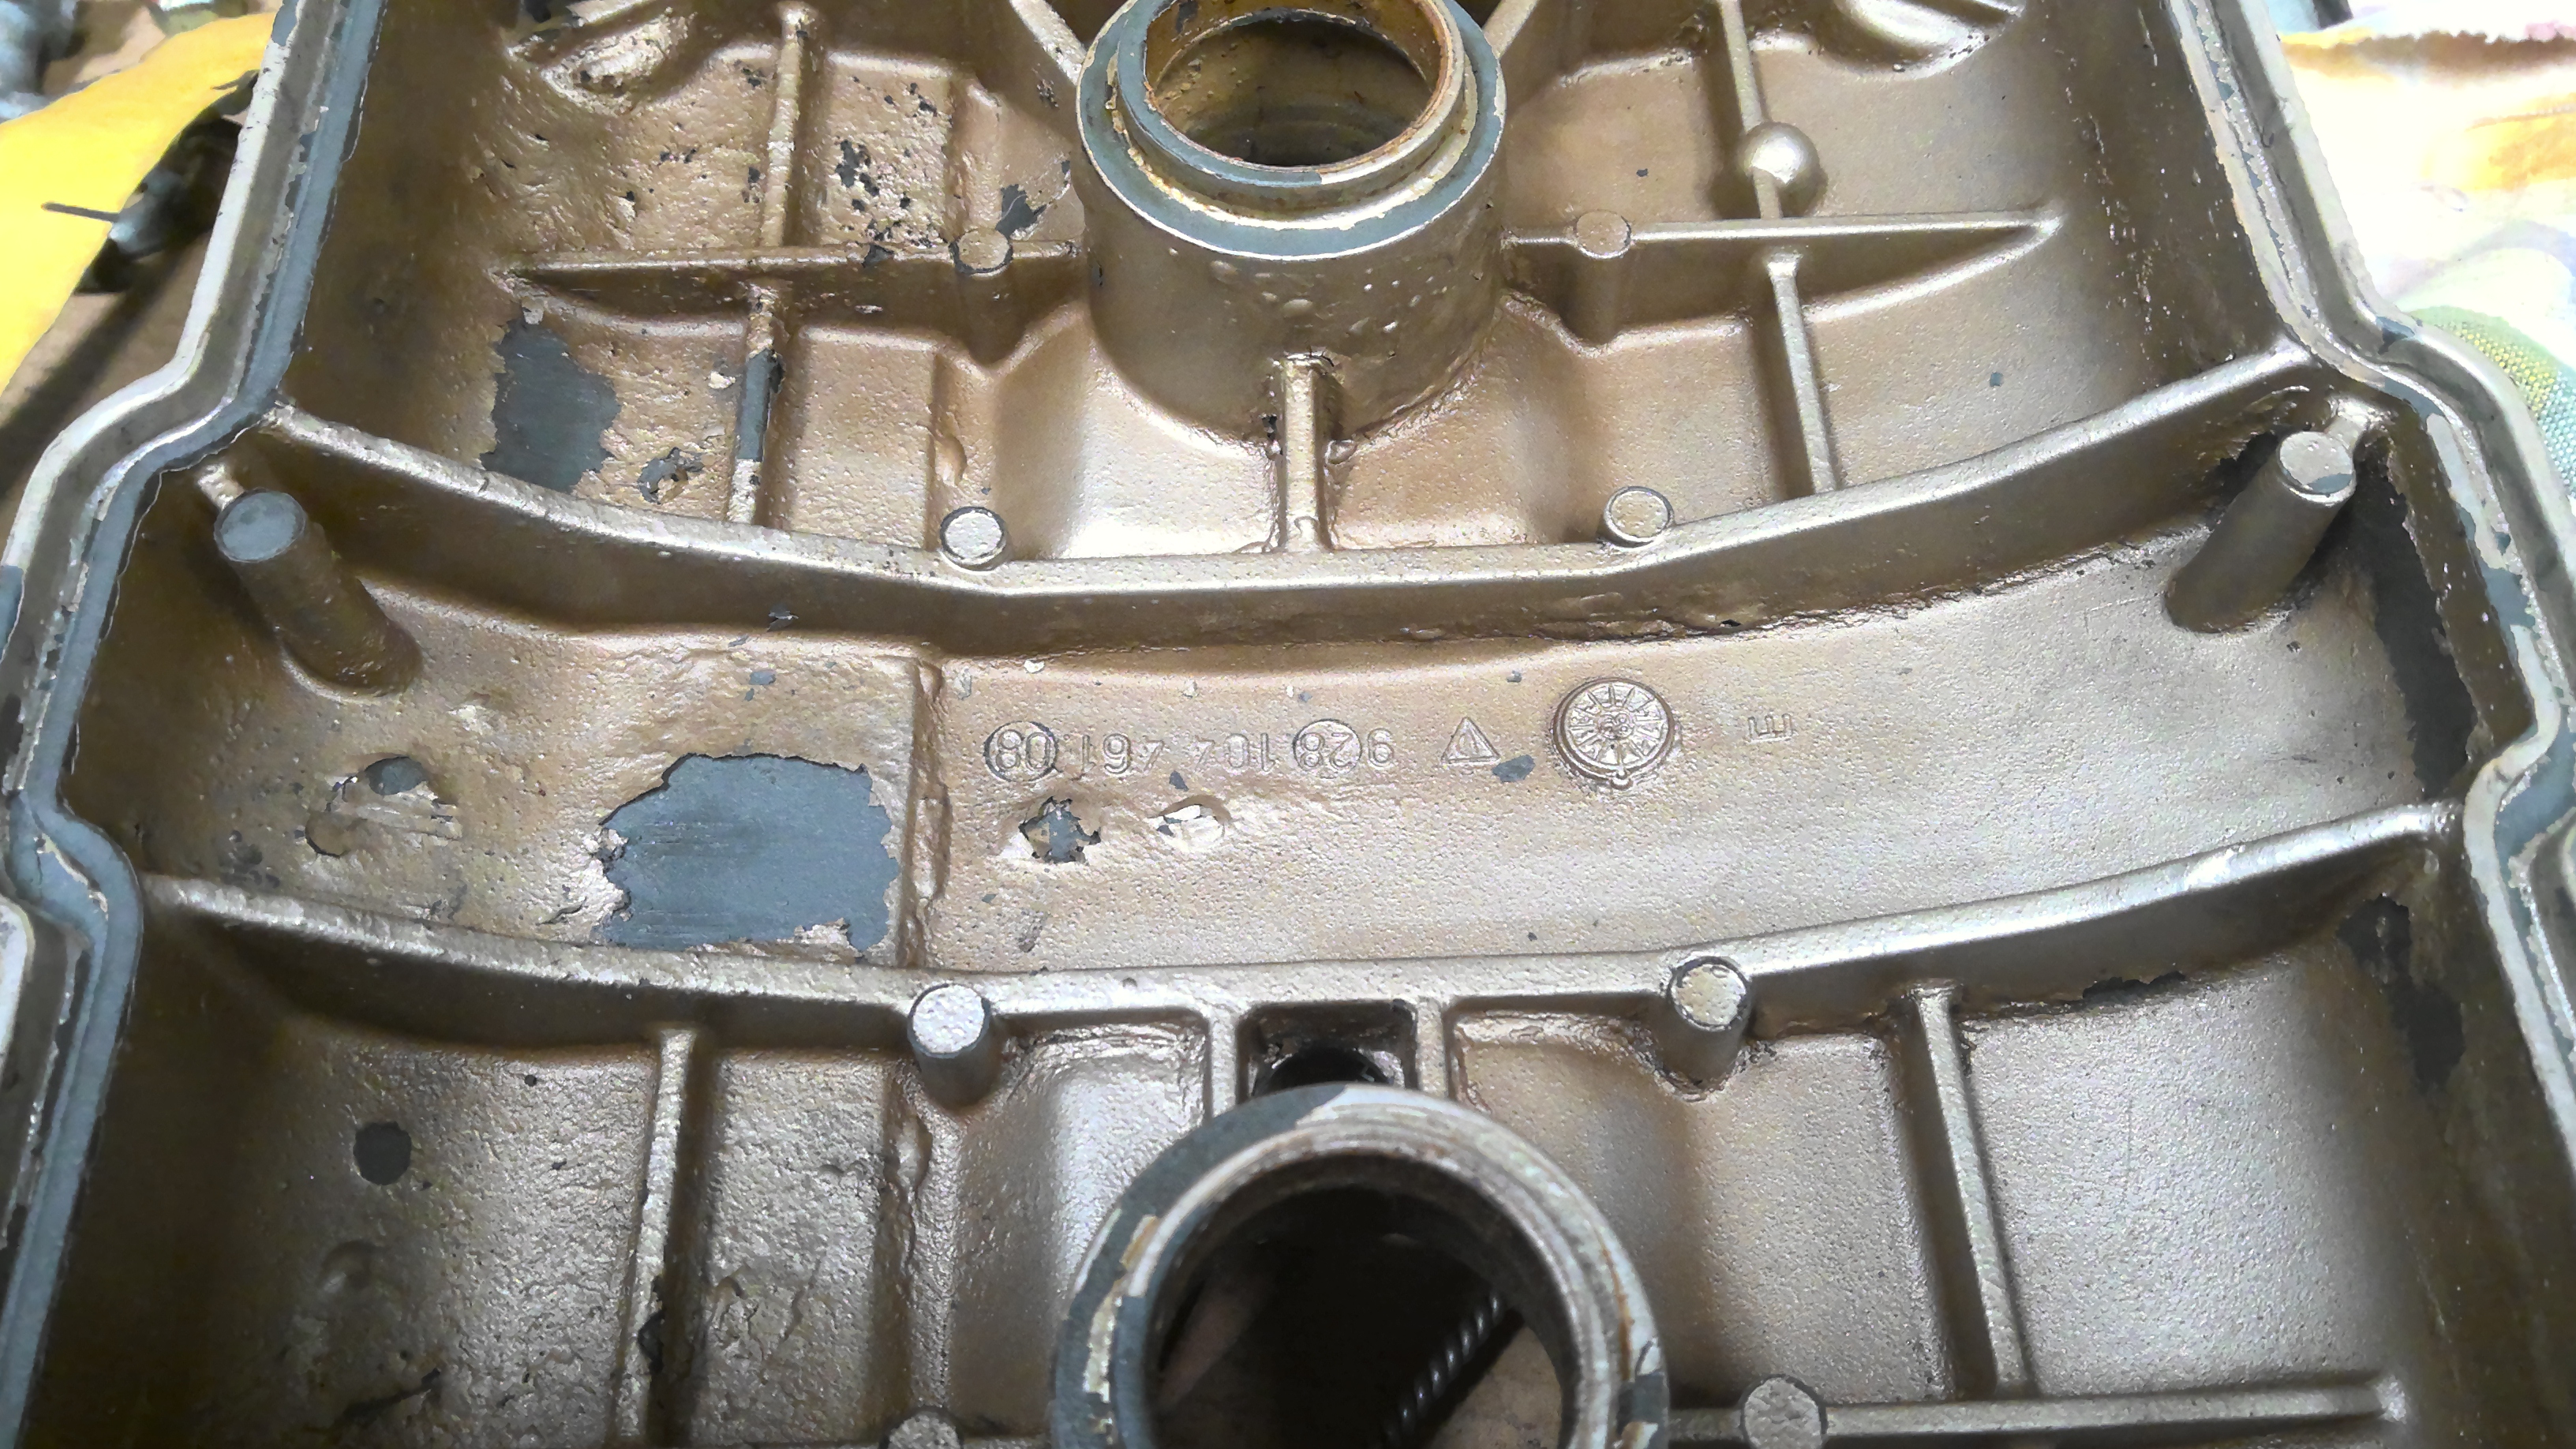
Posted: Sun Jan 12, 2025 10:17 pm
by miggytosh
Update

I was able to remove the cam cover without issue and my buddy Erik, who had had a similar situation with his 928, was able to gently remove the broken end with a pick and small hammer. I have to say I am totally impressed by how well everything came apart and how good everything seems to be under the cover. We checked the top tensioner and it's in good nick.
@barnwerks have a look at the attached cam cover image but the inside of the cam cover doesn't seem to be flaking so far.
This all came from me tracking down an oil leak and I found that my AOS seals had failed, so that's been removed, seals replaced, and reinstalled. Because getting to the AOS requires the manifold be be removed, I am replacing original intake gasket and replacing the injector seals and filters. That will be a few days as I wait for parts.
Re: Ugh, Broken Cam Cover Bolt
Posted: Mon Jan 13, 2025 4:28 am
by barnwerks
Agreed, the finish on the exposed interior of the cam cover appears to be holding on. The seals have not been removed in the photo. Does this indicate a plan to re-install the cover without further removing / disturbing anything?