To start with, the switch surroundings were all but non existant. Not my first rodeo. Grab the fiber glass.


Of course all of the plastic clips had been pulled through and all but one were missing. I bought all new clips.
Round one with mat to build up where I removed a lot of the falling apart card material. A little cloth too.


After this was fully cured, I went back with a product called Fibral to recreate where the metal cips used to be. That part of the car was completely gone once I trimmed out all of the bad. A little grinding and sanding, then another layer of cloth.

From the from other side

On the the torn out clip locations. I just used fiberglass resin with no cloth on these spots. In hindsight, maybe not the best idea. It did substantially increase the rigidity and seems to have glued all the fray back together.

Seems I accidentally deleted the pics of this all cured up before install. Speaking of install...
Before putting the car on, I had to address the missing vapor barrier. 3M MWUR9 widow weld butyl ribbon to the rescue. As well as some 6mil dropcloth. A lot of the door was very tacky from the original barrier still, so that helped out with not needing a lot of the butyl ribbon. The 1/4" round butyl was stretched thin and "skillfully applied". Then rolled over the bead/plastic to get a solid seal.

Now for the real fun!
Placing the doorcard back on and realizing that I don't really know what I'm doing. That metal arm on the backside of the top armrest mout was the first combatant. Once I realized it actually slides into the door frame that was step one. As well as beer time while I scratched my head.
I bought this hardware kit off Ebay from a German seller. (I didn't know that when I bought it) It took about 3 weeks to be delivered, but so far had everything I needed as well as a couple pages from the PET (in German) and all parts nicely bagged and tagged.

Here's a link to the listing for anyone interested https://ebay.us/m/bLB4eL
After that I thought I was golden! Until I tried to mount the card. The 2 front most screws did not line up with a hole in the door. There wasn't even a hole within inches. Well, there is now. Maybe another late/early difference? I already know the door has been replaced so who knows what it is actually off of.
The next problem was the pocket in the bottom of the door. It was too big to fit in the recess in the door frame. this held the bottom of the card way off the metal frame. No way I could get the rest together like this. You can see where it is pushing in on the front side of the pocket.

Removed the card and took measurements. Definitely not going to fit. A little percussive maintanance persuasion in that area of the door card was the solution. I know .. not ideal. In the end no one will ever know once the lower pocket is reinstalled.
I thought the fight was over and I was grabbing another cold one in celebration. Too soon ..
3 of 4 holes in the bottom of the pocket trim piece line up with nothing and I'm missing the little block in the front of that pocket piece that screws to the door and to the trim. Time for the parts car's first donation
Anyways, at this point it was time to get the switch panel installed and test that all of that still works. I'm not sure if I have the wiring harness correct. Obviously I have something wrong here. It is pushing on the switch from the back with some pretty good force. I tried moving it around and tucking it a few different ways. This easily clipped into place and were much more flush on the bench.


Any advice there? I'm sure this is installer error somewhere
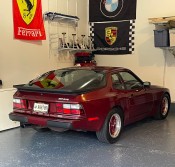
After all of this I now have all windows and mirrors working for the first time!!! So I had to go for a quick mountain run yesterday.