Ok new thread for a new dedicated topic.
I reassembled the engine over 2+ years from a completely disassembled state, so I did it the “dry” way. Obviously did not work - one leak at front pass side corner and one in back, so my plan:
1. Secure Yamabond 4 - check
1.5 Drain oil
2. Support engine from above with hoist
3. Drop crossover and crossmember enough to loosen and drop oil pan far enough to get to both sides of gasket
4. Leave oil pan bolts in place but loosened where no yamabond is needed to aid in realignment.
5. Clean fresh oil from contact surfaces -especially where it leaked through
6. Apply yamabond as directed and let set as directed
7. Replace bolts in corners and begin torque sequence.
My question is this - everything I have read says apply the YB in the corners…what defines the “corner”? Is that definition different for the rounded corners versus the sharp corners where the vertical sections are? So - how far down the straightaway do I go with the yamabond once the corner radius stops - or is it literally one little dot precisely in the corner?
Can you tell this is the last time I want to do this?
Thanks all!
Oil pan gasket sealing
-
Drscottsmith

- Posts: 230
- Joined: Thu Feb 16, 2023 5:43 pm
- Has thanked: 3 times
- Been thanked: 15 times
-
Drscottsmith
- Posts: 230
- Joined: Thu Feb 16, 2023 5:43 pm
- Has thanked: 3 times
- Been thanked: 15 times
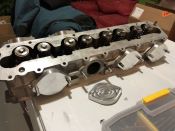
Here is a pic for reference. I guess what I am asking is should my “corner be more defined as the yellow long stripe example or the little red dot opposite that?
A better way to think about it - between what bolt numbers should yamabond be applied?
Thanks!
A better way to think about it - between what bolt numbers should yamabond be applied?
- IMG_0040.jpeg (91.38 KiB) Viewed 2642 times

The sealant goes in between the flat part of the block and where the oil pump in the front and girdle at the rear seal intersect. I put it on both sides of the gasket. You just need a small dab of it.
Hopefully, that makes sense.
Hopefully, that makes sense.

I do not have a way to markup the picture.
Take bolt 21 as an example. The sealant goes in the corner between the groove in the oil pump and the block. Then install the gasket, and put a dab on the oil pan opposite the same location. It makes more sense if you are looking at the oil pan gasket. The are corners are obvious on the seal.
Take bolt 21 as an example. The sealant goes in the corner between the groove in the oil pump and the block. Then install the gasket, and put a dab on the oil pan opposite the same location. It makes more sense if you are looking at the oil pan gasket. The are corners are obvious on the seal.
-
Drscottsmith
- Posts: 230
- Joined: Thu Feb 16, 2023 5:43 pm
- Has thanked: 3 times
- Been thanked: 15 times
Ok attached a couple more photos - sorry I did not take one when putting the pan back on (too worried about torque sequence)...
So I think I understand the sealant needs to be in the corners in RED, not the outer "corners" of the gasket (example on rear view in yellow).
I was under the impression you needed it (for example) between bolts 15-19 and 16-20 (around THOSE corners).
So I think I understand the sealant needs to be in the corners in RED, not the outer "corners" of the gasket (example on rear view in yellow).
- IMG_0401.jpeg (271.67 KiB) Viewed 2598 times
- IMG_0682.jpeg (329.87 KiB) Viewed 2598 times
I was under the impression you needed it (for example) between bolts 15-19 and 16-20 (around THOSE corners).
-
Tom

- Site Admin
- Posts: 8567
- Joined: Fri Jun 25, 2021 2:04 pm
- Location: Silicon Valley, CA
- Has thanked: 891 times
- Been thanked: 3847 times
- Contact:
Somewhere there is a factory picture showing the factory sealant, Dow 730, in those corners. I poked around for it yesterday and couldn't find it. I use the factory $ealant in those corners and followed the factory torque sequence/specs, and haven't had a leak (knock on wood).
-
Drscottsmith
- Posts: 230
- Joined: Thu Feb 16, 2023 5:43 pm
- Has thanked: 3 times
- Been thanked: 15 times
Thanks all - will report back after I get this solved (hopefully) tomorrow!